Budget-Friendly Toyota 4Runner Mods That Actually Make a Difference
Estes is my 4Runner. Named after Estes Park, Colorado. This vehicle has carried me to every remote trailhead, desert camp, and predawn photography location across the American West. Shafer Trail in Moab. Burr Trail through Grand Staircase. Dirt roads to Monument Valley at 4 AM. Estes is not just transportation. Estes is part of the adventure. And I’ve been modifying this rig on a budget since day one.
I’m also autistic. My vehicle is my mobile base camp, my safe space, and my sensory cocoon during long drives through remote terrain. Interior organization reduces anxiety. Consistent lighting reduces sensory overload. Everything in its place means one less thing my brain has to process when I’m tired, driving unfamiliar roads, or managing the unpredictability of off-grid travel. These mods aren’t just about looking cool. They make Estes function better for how my brain works.
These are the budget 4Runner mods I’ve actually installed on Estes. Every one tested on real trips. Most take less than 20 minutes to install. No gimmicks.
The Best Budget 4Runner Mods
1. Husky X-Act Contour Floor Mats, Custom-Molded Protection for Trail Dirt
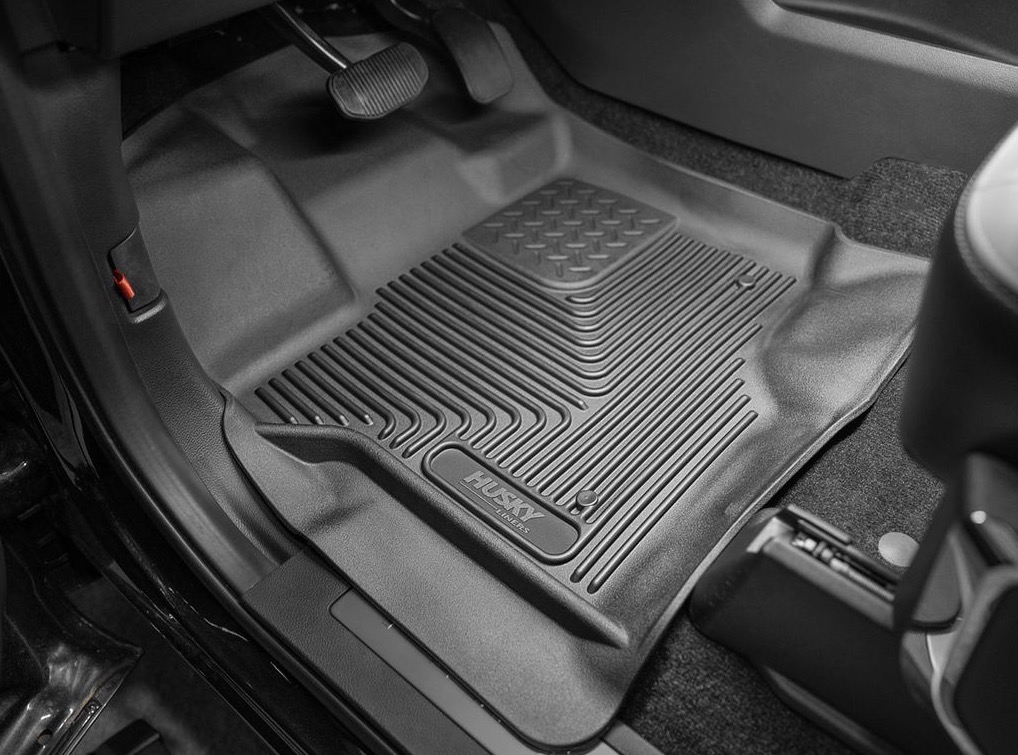
The Husky X-Act Contour Floor Mats are custom-molded to the 4Runner’s floor. Grippy surface. Easy to clean with a hose. Contain mud, dust, coffee spills, and trail debris.
First mod I did. Trashed the factory floor mats after one muddy trail. These Husky mats are molded perfectly to Estes’ floor and contain everything. Mud from the Uintas. Red desert dust from Grand Staircase. Spilled coffee from predawn drives. Trail debris from every hike. The grippy surface keeps them locked in place. Cleaning is a hose and a flick of the wrist. The factory mats shifted around and let dirt underneath. These don’t. For anyone who uses their 4Runner as a real adventure vehicle, floor protection is the first upgrade that makes a daily difference. Every time I get back in Estes after a dusty day, the interior stays clean because the mats caught everything. That matters for someone who lives in this vehicle for days at a time on extended trips. Simple mod. Instant improvement. Should have done it on day one.
2. Glove Box and Center Console Organizers, Everything in Its Place
The Glove Box and Center Console Organizers are drawer dividers for your 4Runner’s storage compartments. Separate tools, paperwork, coins, and gear into organized sections.
I like my gear where I can grab it without looking. These organizers are drawer dividers for Estes’ glove box and center console. Tools in one section. Paperwork in another. Phone cables, coins, and trail snacks all have homes. No more fishing through a jumbled mess while bouncing down a washboard road. Organization reduces cognitive load. When everything has a place, I don’t waste mental energy searching. I reach for what I need and find it exactly where it belongs. Same spot every time. That predictability matters more to me than most people realize. On rough trails where I need to grab a tool or find my headlamp quickly, organized compartments save time and frustration. Simple plastic dividers that cost almost nothing and transform how you interact with your vehicle’s storage every single day.
3. Black Emblem Overlays, Instant Blacked-Out Exterior Upgrade
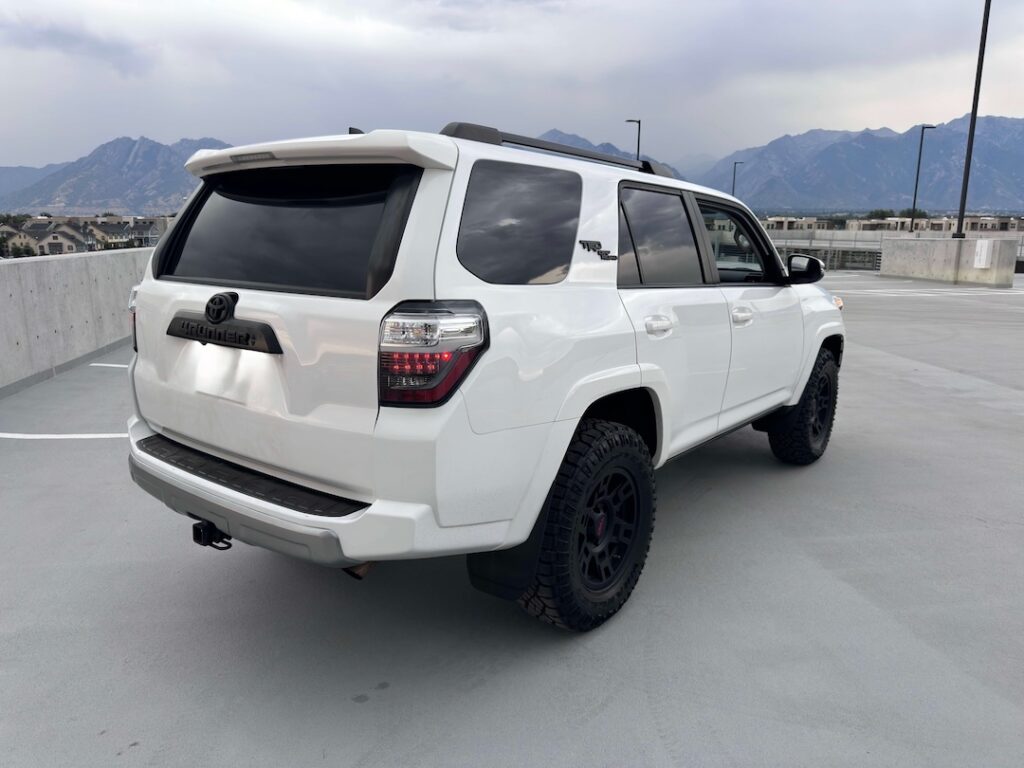
The Black Emblem Overlays stick directly over the factory chrome emblems. No removal needed. Instant blacked-out appearance. Available from YotaXpedition.
This one’s cosmetic. Nothing wrong with the factory chrome, but I wanted a more rugged, blacked-out look on Estes. These overlays stick directly over the existing emblems. No removal. No drilling. No risk of damaging the paint underneath. Peel, align, press, done. Instant visual upgrade for under $30. The blacked-out look matches the adventure aesthetic better than chrome. On a rig that spends its life on dirt roads and at remote trailheads, the rugged appearance feels right. It’s a small detail that changes how the whole front end looks. The tradeoff is that these are adhesive overlays, not replacement emblems. In extreme heat, adhesive can soften. In extreme cold, it can get brittle. Clean the surface thoroughly before application for the best bond. For a budget cosmetic mod that takes 5 minutes and costs almost nothing, the visual impact is disproportionately large.
4. Drop Stop Seat Gap Fillers, Plug the Pit of Death
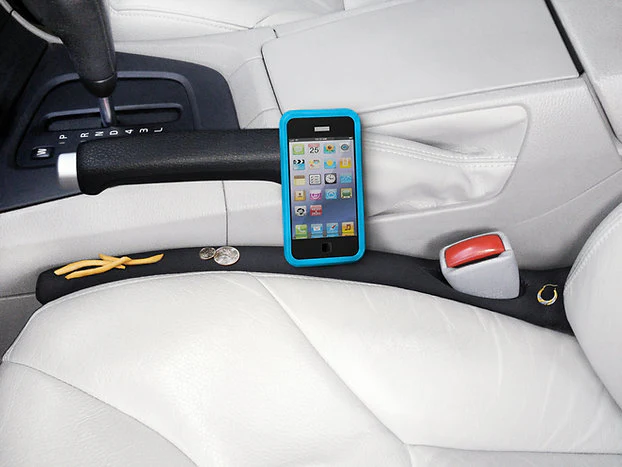
The Drop Stop Seat Gap Fillers wedge into the gap between your seat and center console. Block phones, keys, snacks, and coins from falling into the unreachable void.
The pit of death exists in every vehicle. That gap between the seat and the center console where your phone, keys, coins, and trail snacks disappear into an unreachable void. These fillers wedge into the gap and stay put, even on washboard roads through Escalante and rough two-tracks in the Uintas. I dropped my phone into that gap on Shafer Trail once. Trying to fish it out while driving a narrow shelf road with a cliff drop is not an experience I wanted to repeat. Drop Stops eliminated the problem entirely. One of those mods where you wonder why you didn’t do it years ago. The gap is sealed. Nothing falls through. Simple fix for a universal annoyance. They stay in place through vibration, temperature changes, and constant use. Under $20 for permanent peace of mind.
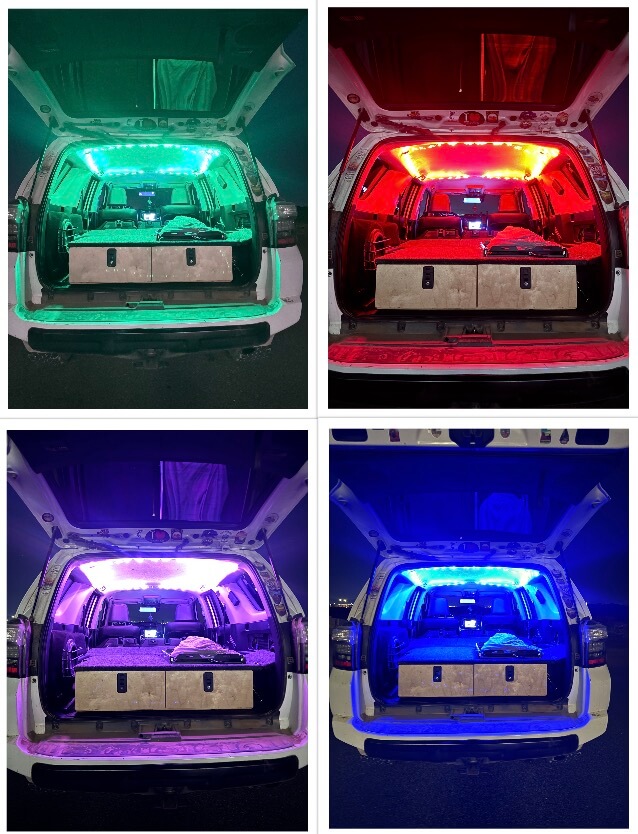
5. LED Lighting Upgrades, Interior and Exterior Bulb Swaps
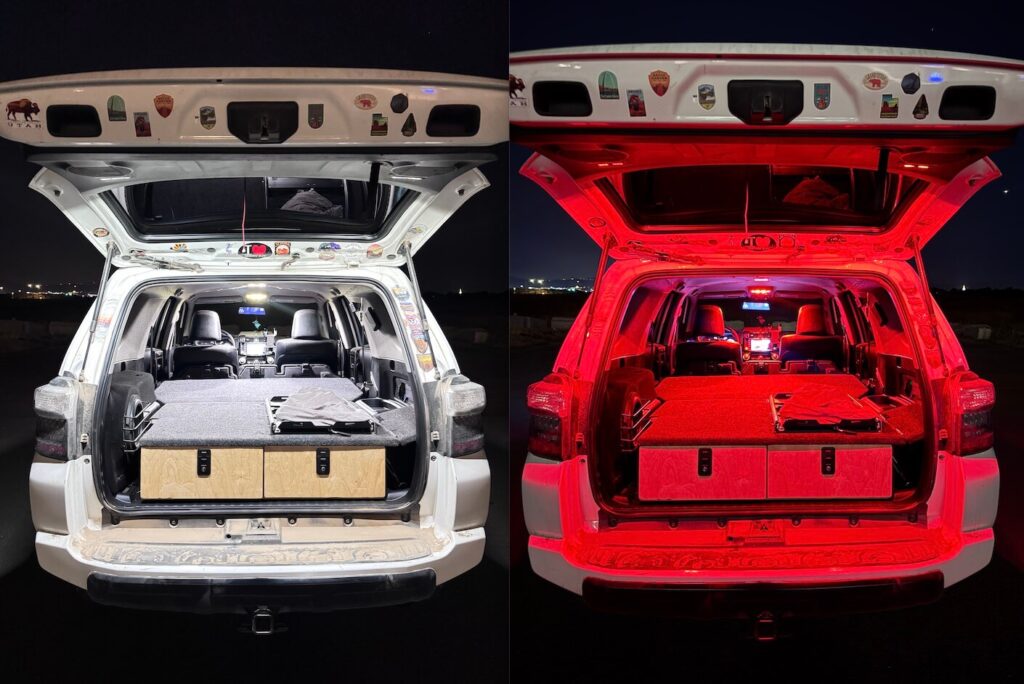
The LED License Plate Bulbs (Size 194) and LED Reverse Bulbs from Lasfit. Plus Meso Customs red/white dome lights, hatch lights, and map lights from mesocustoms.com.
Want Estes to feel 10 years newer? Swap the bulbs. I replaced the license plate lights, reverse lights, and interior dome lights with Lasfit LEDs. Brighter, cleaner, whiter light everywhere. The reverse lights actually illuminate what’s behind me now. The interior dome lights went further with Meso Customs dual-color red/white bulbs for the dome, hatch, and map lights. The red light option preserves night vision at camp. White for when you need to find something. Toggle between them. This matters for night photography. I set up at locations like Mesa Arch and Muley Point in total darkness. Red interior light lets me find gear without destroying my dark-adapted vision. White light for detailed tasks when dark adaptation doesn’t matter. The whole LED upgrade across all bulb positions costs less than $100 total and takes maybe 30 minutes. The difference in light quality and functionality is dramatic. Makes the entire vehicle feel modern and intentional.
 LED License Plate Bulbs (Size 194) LED Reverse Bulbs (Size 921) Meso Customs Red/White Dome Lights
Meso Customs Red/White Hatch Lights
Meso Customs Red/White Map Lights
6. Fang Lights and Raptor Lights, Front-End Presence That Plugs Right In
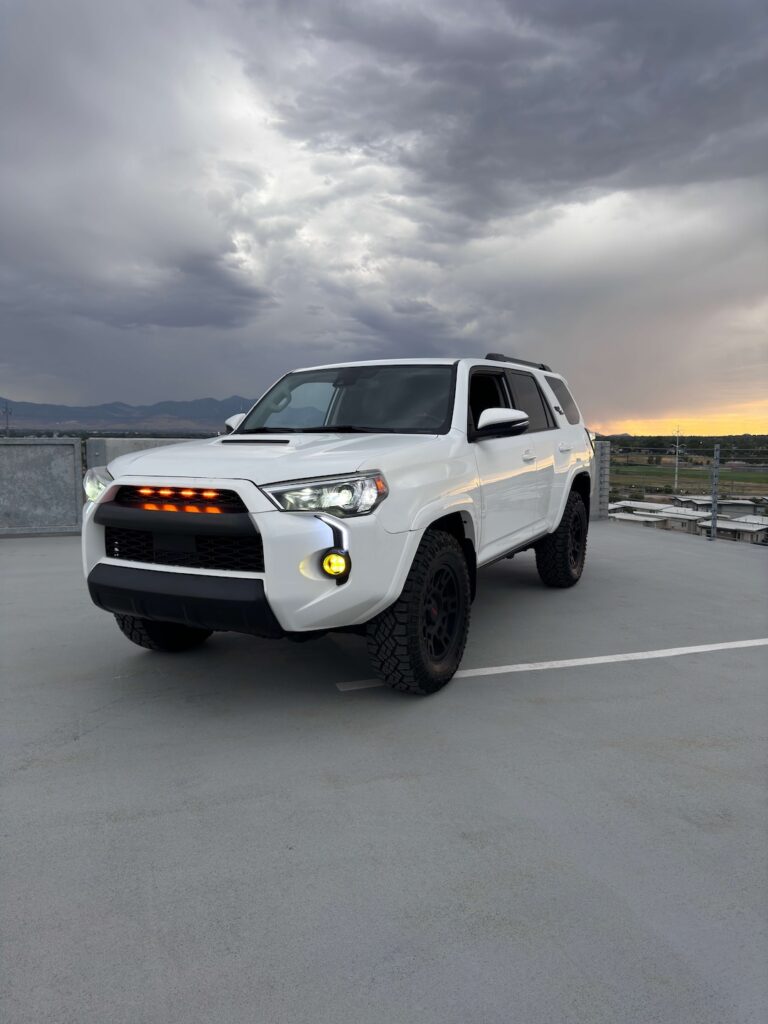
The Raptor Lights from Amazon plus Fang Lights from YotaXpedition. Both plug into existing wiring. No headlight warranty issues.
The Fang lights give Estes’ front end some bite and the Raptor lights complete the look. Both plug directly into existing wiring. No splicing. No warranty issues with the headlights. The Fang lights sit in the lower bumper area and add illumination plus visual presence. The amber Raptor lights across the grille add the wide-body look that larger Toyota trucks have from the factory. Together they transform the front end from stock to purposeful. I like how Estes looks with these. That’s honest. But there’s a functional benefit too. The additional front lighting helps with visibility at twilight on dirt roads and in parking areas at trailheads. The amber Raptor lights are visible to other drivers from a distance, which adds safety on narrow mountain roads. Both installed in under 30 minutes total with no tools beyond basic hands. Budget-friendly visual and functional upgrade.
Get Fang Lights Raptor Lights Here
7. Akarin Door Logo Lights, Toyota Emblem Projection When You Open Up
![]()
The Akarin Door Logo Lights project the Toyota logo onto the ground when you open the door. Plug-and-play installation.
Okay, this one’s a little cringey. I admit it. But when you open the door in a dark desert or at a predawn trailhead parking lot and the Toyota logo hits the ground like a spotlight, it’s kinda sick. Plug-and-play installation. No wiring. They replace the existing door courtesy light housing. The projected logo also serves as functional ground illumination. You can see what you’re stepping onto when you exit the vehicle in the dark. Rocks. Mud. Uneven ground. That matters at remote trailheads where I’m getting out of Estes at 4 AM in total darkness to set up for a sunrise shoot. Is this an essential mod? No. Is it fun and mildly useful? Yes. For under $20, it adds a small detail that makes the vehicle feel custom and puts light where you need it when exiting. Sometimes mods don’t need to be practical to be worth doing.
8. Wolfbox G840S Mirror Dash Cam, Full-Screen Rearview With Recording
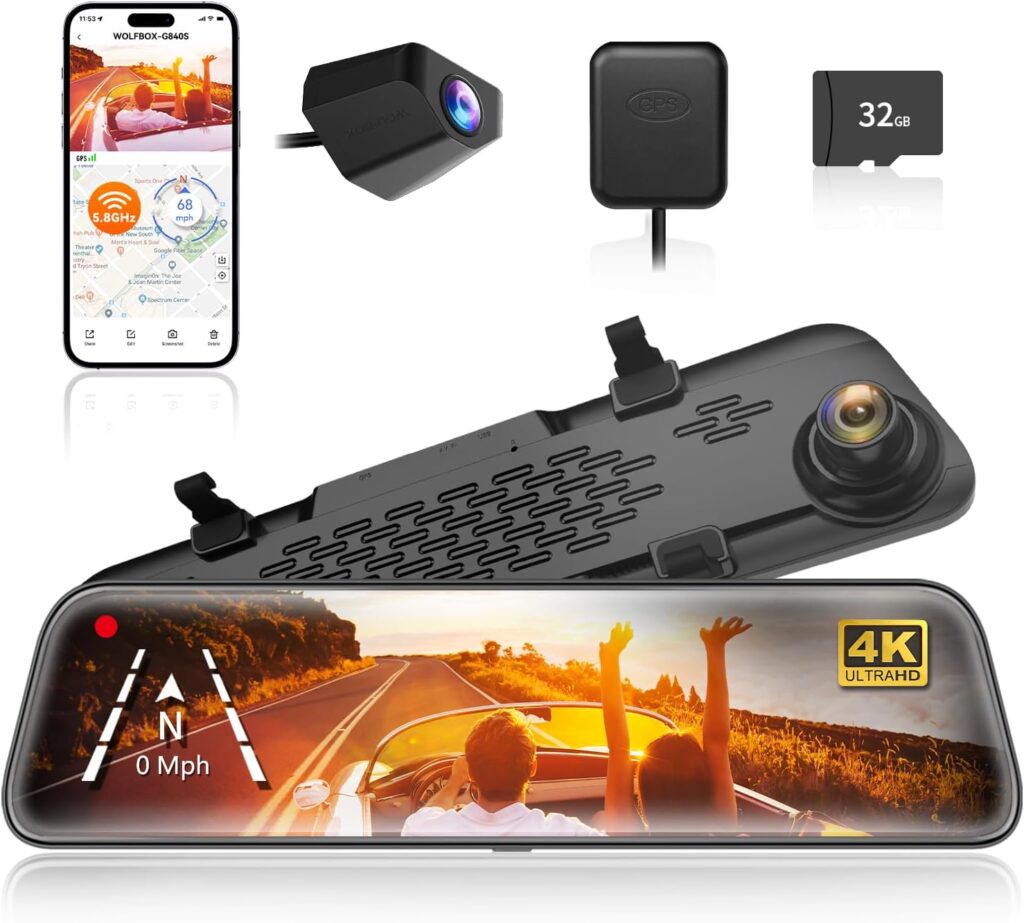
The Wolfbox G840S Mirror Dash Cam is a full-screen rearview mirror replacement with front and rear cameras. Crystal clear display. Works in low light. Doubles as dash cam for insurance documentation.
Not just cosmetic. This is a real functional upgrade. The Wolfbox replaces the standard rearview mirror with a full-screen display showing the rear camera feed. Crystal clear image. Works in low light. The field of view is wider than the standard mirror, which helps on sketchy trail exits and tight parking at trailheads. I use it like a co-pilot when reversing on narrow mountain roads and backing into camp spots at remote sites. The front-facing camera records continuously for dash cam footage, which provides insurance documentation in case of incidents. I drive Estes through some remote, challenging terrain. Shafer Trail. Burr Trail. Narrow forest roads in the Uintas. Having clear rear visibility and a recording of what happens reduces stress and provides evidence if something goes wrong. The tradeoff is the wiring installation, which is more involved than other mods on this list. Budget about an hour for a clean install. Worth it for the daily functionality improvement.
9. Window Deflectors, Cracked Windows Without Rain or Dust
The Window Deflectors allow you to crack windows for ventilation while blocking rain, dust, and debris from entering the cabin.
I leave Estes’ windows cracked for ventilation when camping overnight. Window deflectors let me do that without rain getting in or dust coating the interior. Subtle mod that makes a significant difference for overnight vehicle camping. Fresh air circulates through the cabin without the downsides of fully open windows. On desert trips through Grand Staircase and Moab where nighttime temperatures are comfortable, cracked windows with deflectors create natural airflow that keeps the interior from getting stuffy. During rain at mountain camps in the Uintas, the deflectors shed water while maintaining ventilation. Also reduces interior fog on cold mornings because moist air escapes instead of condensing on glass. Install is straightforward with no drilling on most models. The deflectors sit in the window channel and stay put through highway speeds, off-road vibration, and weather. For anyone who sleeps in their vehicle or just wants ventilation options on the trail, this is a quality-of-life upgrade.
10. Fairy LED Lights and INIU Portable Charger, Camp Vibes That Actually Help
The Fairy LED Lights are USB-powered string lights. Pair with an INIU Portable Charger for cordless camp lighting. Weigh nothing. Multiple color options.
I know fairy lights sound ridiculous for a 4Runner build. Hear me out. After a long day on the trail, soft ambient light at camp changes the whole vibe. These weigh nothing. USB-powered, so I run them off an INIU portable charger. No vehicle battery drain. String them along Estes’ roof rack, inside the hatch area, or around the camp setup. They provide gentle ambient light that’s easier on the eyes than a blinding headlamp or harsh lantern. For someone whose nervous system is spent after a full day of sensory input on the trail, soft warm light is significantly less overwhelming than bright white LEDs. I wind down under fairy lights, not stadium lighting. They also serve as functional camp markers. Other vehicles can see your camp location. Trailhead tailgates look welcoming. Night photography setups get a touch of atmosphere. Double as nightlights for sleeping in the vehicle. Total game changer for evening camp ambiance at desert sites in Grand Staircase and mountain camps in the Uintas.
Snag a pack of USB-powered fairy lights here
Power them with this Portable Charger
How to Approach Budget 4Runner Mods
Start with function before aesthetics. Floor mats, organizers, and the dash cam improve daily usability. LED lighting improves visibility and safety. Window deflectors improve ventilation. These mods solve actual problems. Cosmetic mods like emblem overlays, fang lights, and logo lights come after the functional foundation is solid.
Install the easiest mods first to build confidence. Floor mats, Drop Stops, emblem overlays, and fairy lights are all sub-10-minute installs with no tools. LED bulb swaps take minutes per bulb. The dash cam is the most involved install at about an hour. Every mod on this list is designed for DIY installation. No shop time needed. No special tools. If you can follow basic directions and use your hands, you can install all of these in a single afternoon.
Frequently Asked Questions
What’s the single best budget 4Runner mod on this list?
The Husky X-Act Contour Floor Mats. You use them every single time you get in the vehicle. They protect the interior from every trip’s worth of mud, dust, and spills. After that, the LED lighting upgrades provide the most dramatic improvement in how the vehicle looks and functions for the cost.
Do any of these mods void the warranty?
No. All mods on this list are non-invasive. Floor mats, organizers, emblem overlays, seat gap fillers, and LED bulb swaps don’t affect vehicle systems. The Fang lights and Raptor lights plug into existing wiring without modification. The dash cam is an accessory. Window deflectors sit in the window channel. Nothing requires cutting, splicing, or permanent modification to the vehicle.
Are these mods useful for someone with sensory sensitivities?
Yes. Organizers reduce the mental load of finding things. LED lighting with red/white toggle prevents the sensory shock of bright white light in darkness. Floor mats keep the interior clean, which reduces the tactile discomfort of a dirty vehicle. Fairy lights provide gentle ambient light that’s less overwhelming than harsh camp lighting. Window deflectors provide airflow without the chaos of fully open windows. These mods create a more predictable, controlled vehicle environment.
How much does the full list of mods cost?
Roughly $300 to $500 total depending on options. Floor mats are the most expensive single item. LED bulb upgrades across all positions run about $80 to $100. Everything else is under $30 per item. Spread across a few months, the total investment is very manageable and every mod provides daily value.
Do these mods work on other 4Runner generations or Toyota trucks?
Some are universal. Drop Stops, fairy lights, organizers, and the dash cam work in any vehicle. Floor mats, emblem overlays, Fang lights, and Raptor lights are 5th gen 4Runner specific. LED bulb sizes vary by vehicle, check your owner’s manual for correct sizes. Window deflectors are model-specific. Always verify fitment before purchasing.
Small Mods, Big Difference
I didn’t build Estes overnight. I didn’t build it on a big budget. These mods happened one at a time over months of real use across the American West. Every single one solved a problem, improved a function, or made the vehicle feel more like mine. That’s what good mods do. They make the vehicle work better for how you actually use it.
Estes carries me to the places I photograph, the trails I hike, and the camps where I recover. Every mod on this list makes that partnership a little better.
Support the Adventure
To make your walls less boring, check out my photography portfolio and bring a piece of the wild and my story into your home.
If you’d like to fuel future adventures, you can donate a coffee on Ko-Fi. Every cup keeps me chasing sunrises and stories.
When you shop using my affiliate links, every click helps support this blog at no extra cost to you. It’s a small way to keep Unicorn Adventure alive and kicking while I keep exploring.
Subscribe to my mailing list for future updates, new stories, and behind-the-scenes adventures.
Stay connected with me on Instagram and TikTok for more photos and daily inspiration.
Thanks for being part of the journey, Unicorn Squadron!
Theo Maynard is a landscape photographer and adventure blogger based in Salt Lake City. He chases remote desert and mountain light across the American West, documents it all solo, and shares the journey through Unicorn Adventure. He’s on the autism spectrum, and that’s not a footnote, it’s the whole story. He creates to inspire others to get outside, chase what lights them up, and live their best possible life. Unapologetically himself.